Follow this quickstart guide to set up XCCacheAgent and start caching your Xcode builds. This will help you understand the basic workflow and get your first cache hits. For a hands-on example, try the quickstart project.
First-time Setup
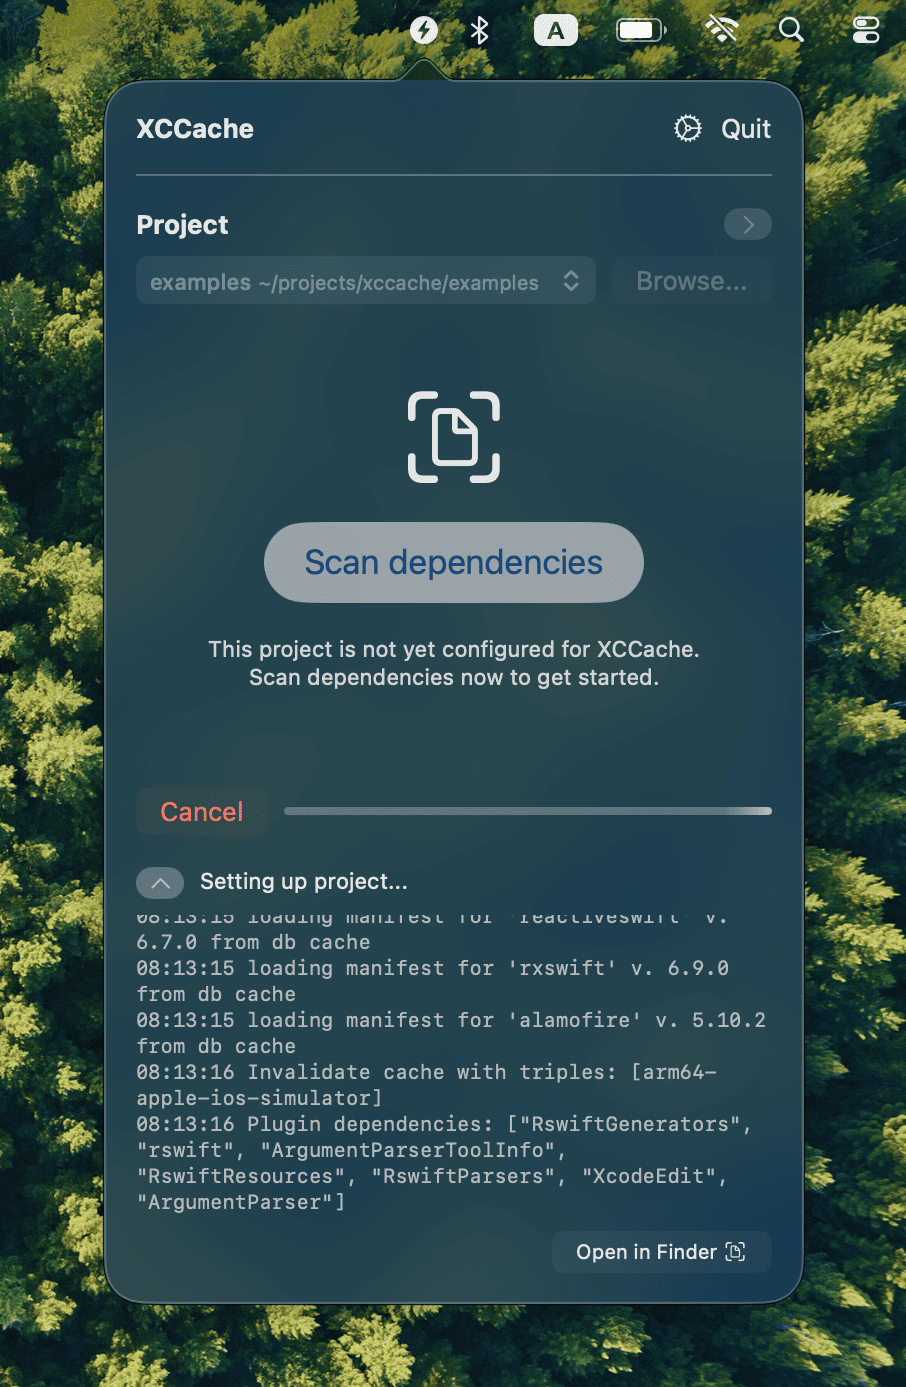
Choose Project
Launch XCCacheAgent and select your Xcode project. The agent will automatically detect your project structure and identify potential caching opportunities.
Scan Dependencies
Run the initial dependency scan to identify all external dependencies and third-party libraries in your project.
- Click Scan Dependencies in the main interface
- Wait for the scan to complete (this may take up to a few minutes for the first time)
- Review the detected dependencies and frameworks
Upon completion, you should see:
xccache.lock: containing the info about packages in the project alongside the products being used. Please track this file in git- The
xccachedirectory: containing build intermediates for the integration. This directory is similar to the Pods directory (in CocoaPods). Do NOT remove this directory. Instead, please ignore it from git.
<Target>.xccache product which includes your product dependencies.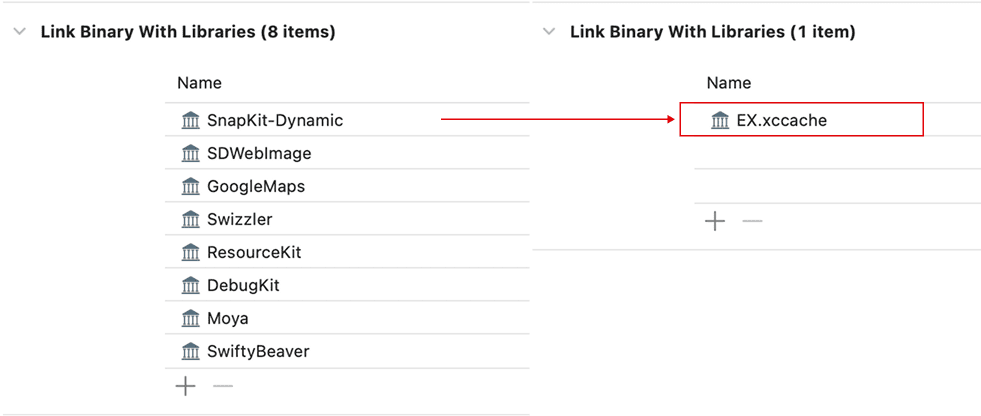
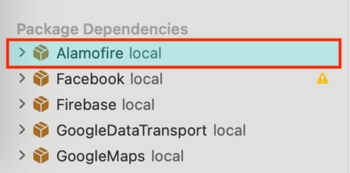
Also, you may notice that all packages turn into local packages. This is perfectly normal as the tool creates special packages called proxy packages to manipulate cache of a package.
After scanning, the main UI will show your project's dependency structure and cache status.
Build Cache
Try Building a Few Targets
Now that your project is set up, try building some targets to start generating cache entries.
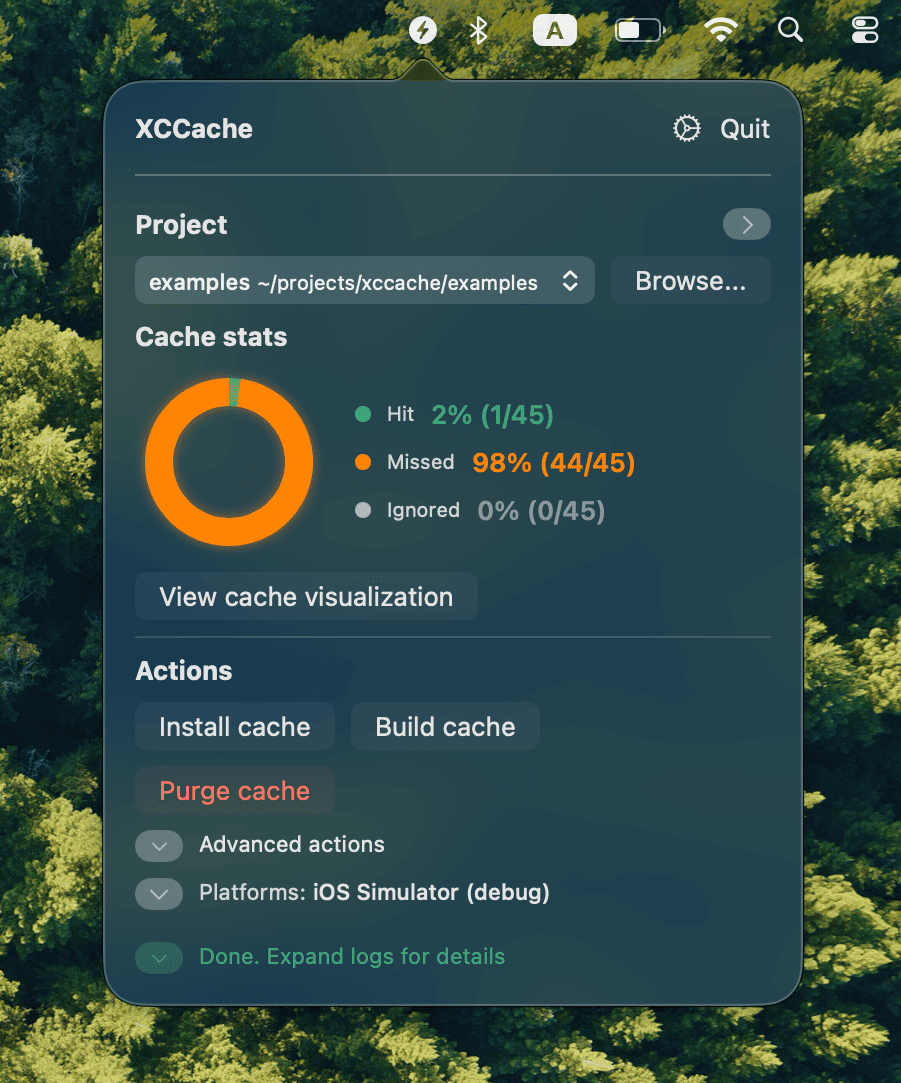
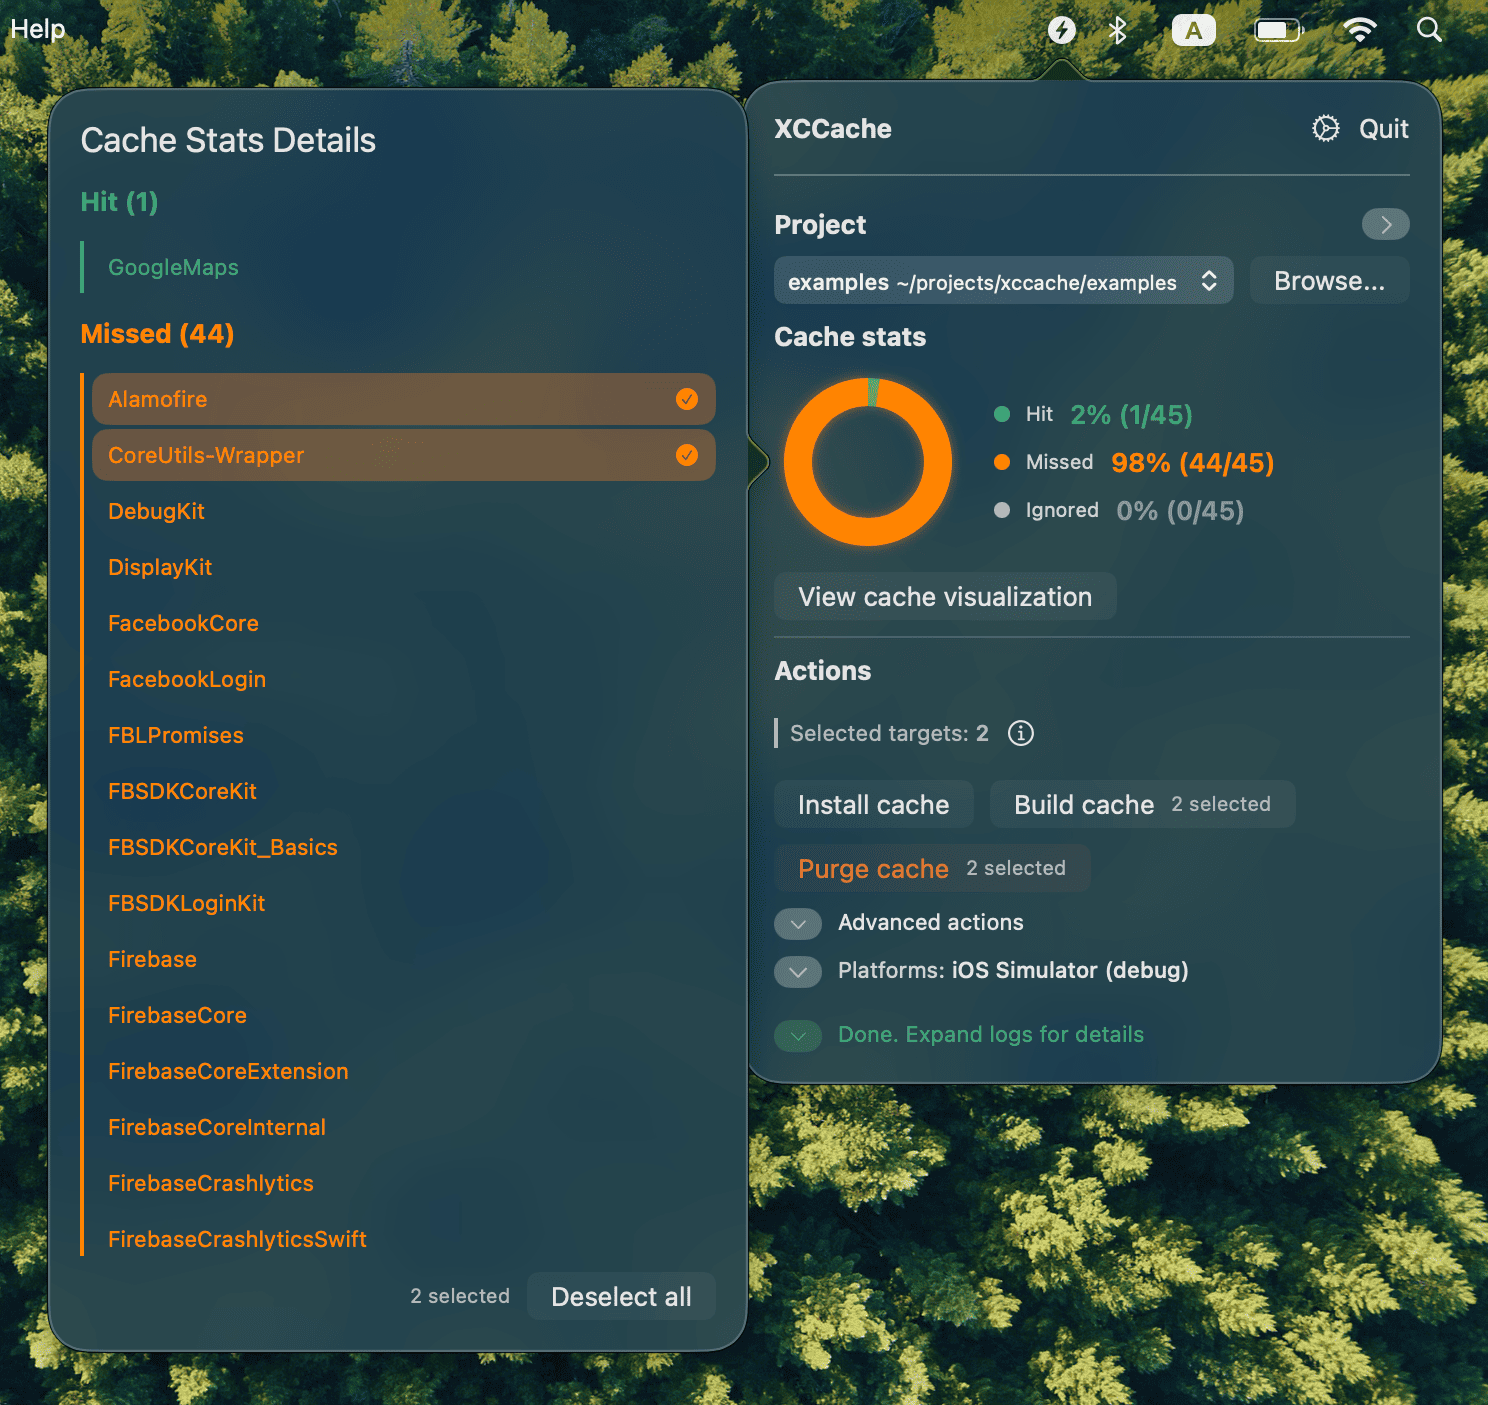
- Click on the cache stats UI to see the extensive list of cache hits and misses
- Click to select a few targets to build
- Right-click on the selected targets and choose Build selected targets Or, you can simply click the Build cache button in the actions view
Building Your Xcode Project
Once cache is built, you can try building your Xcode projects to benefit from the cached dependencies. The cached packages will be automatically integrated into your project.
- Build your project normally in Xcode (⌘+B or Product → Build)
- Watch for significantly faster build times on subsequent builds
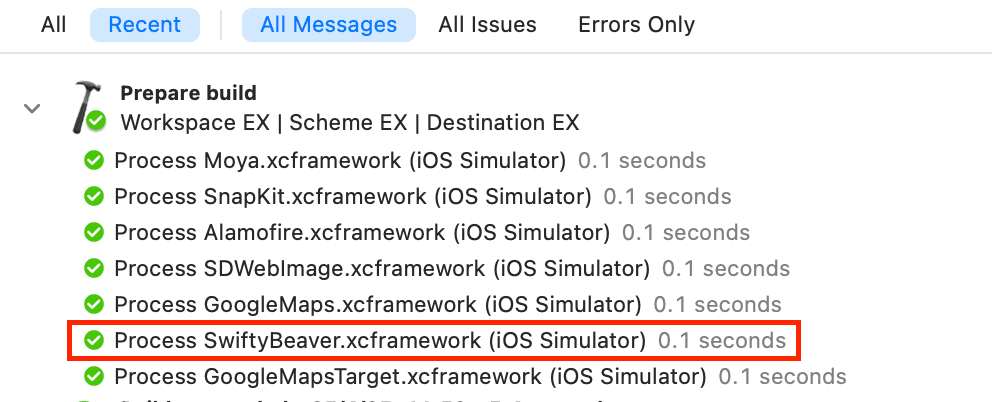
- Check the Xcode build log for cache processing information
💡 Pro Tips
- Start with smaller targets to see immediate cache benefits
- The agent works best with projects that have multiple targets or dependencies
- Consider running the Install cache action periodically as your project evolves